Showing posts with label Science. Show all posts

February 27, 2013

Health & Safety

We were so lucky to have a planned visit from the paramedics at the end of February. It was the perfect way to learn more about taking care of others and added to some of the interactions in the 'health clinic' we had set up in the dramatic play area.
 
Students learned about calling 911, applying pressure to wounds, and wrapping bandages on to their stuffed patients.

 And one volunteer even was able to try on some paramedic gear. A paramedic jacket was donated to our dress up collection even.
 Pulling a bag of paramedic gear is very hard work. Best done with some help.

 And of course we were able to climb into he ambulance and have a good around.
 There were a lot of first aid supplies in there.
A special thanks to Mr. Walker (paramedic & parent) for arranging a special visit for us!
 

January 31, 2013

In January

In January we learned about and explored...
 
ICE
 ~frozen water balloons~
 ~purple ice treasures~
 
PURPLE & BLUE
 
 ~printing with purple using various objects~
~discovering patters in our prints~
 ~blue sensory tubs~
~blue water beads~
 ~sorting blue and purple objects~
~blue dough with shells~
 
MAGNETS
 
~testing various types of magnets at the science table~


January 13, 2012

January Winter Projects

Our theme for January is winter and snow. Here are some of the things we are worked on this month.
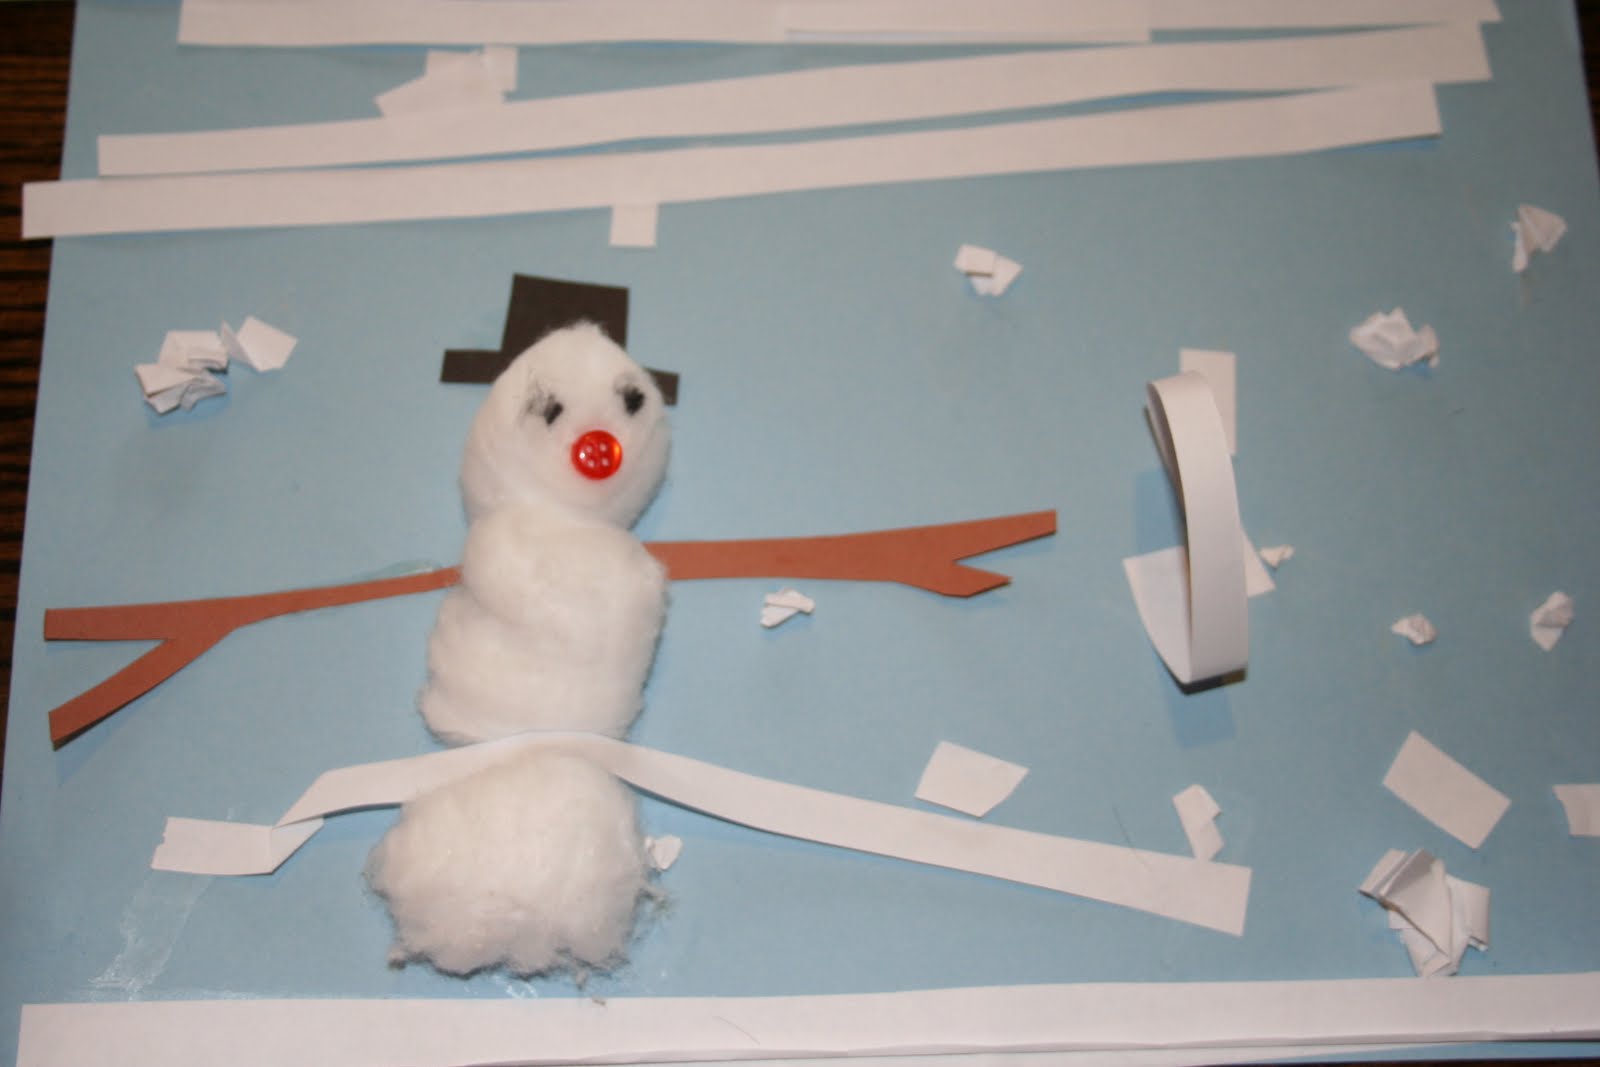
Snowman Collage
The children used cotton balls and cut up paper strips.


Bubble Wrap Prints
We used light and bright blue paint.

I cut pieces into rectangles and used packing tape to close up 2 of the ends. It made the perfect bubble wrap mitt for the children's hands. This was the large bubble wrap and I'd love to try it with the tiny bubble wrap as well.

It started getting very blue so a little purple and lavender was in order.

Look at how nice the pattern looks at the end.

Marshmallow Prints
We used large marshmallows and left over paint from bubble prints.

There was a range of creating from organized to overlapping.

Ice Painting 
We use water and food coloring in ice cube trays to make 'paint'. I add cut pieces of drinking straw so that the kids don't freeze their fingers.

Wood Stick Snow Flakes

Ice Melting
We use an ice block, water tinted with food coloring, salt, and eye droppers for this science exploration. The children learn that ice melts in different ways and can see the variations using the colored water. Teachers sprinkle salt on top of the ice block to speed some of the melting process and create channels in the middle of the cube for the water to run down. Our first group used blue water and our second group used red so we also learned about color mixing too.

Rain Clouds
We made these using construction paper, various blue tissue paper, and cotten balls.

Snow Play
Ok, so we don't live in an area where it snows. The next best thing? Shaving cream! The children painted and sculpted with our version of snow.

October 5, 2011

Coffee Filters


For our first experiment with coffee filters we used liquid water colors to see what would happen if we dropped yellow and red pain onto the surface. Not only were we excited to see how the paper absorbed the paint, but we also enjoyed watching the two primary colors mix to make orange. Using eye droppers also helped us to strengthen our hand muscles for learning to write.


The older students were curious to see what happened when they first decorated their coffee filters with washable markers. After they added lots of designs and colors, clear water was dropped on to the filters. It was amazing to see the colors blend and spread. For both experiments we used about 5-6 coffee filters on top on each other to help absorb the liquid. Some of our coffee filters went home and others we are keeping to use for fall leaves!

August 18, 2011

Dinosaur Fossils


We used playdough, shells, plastic dinos, and plaster of paris to create our fossil. After pressing the playdough into the bottom of a small cup, we imprinted a shell and dinosaur shape. Then plaster of pairs was mixed and poured on top of the prints. The next day we excavated our dinosaurs by pulling off the clay and using tooth picks to get into the small areas.

I will say that the fossils their year were a little rough around the edges. Hence no up and close pics of them because they really were had to see. My plans of using the black playdough from Halloween didn't go as smooth as I thought. What else are you supposed to use back playdough for? Looks kind of like dirt & using it for our other playdough play just didn't seem inviting. Truth be told, fresh new black playdough is about the most sticky thing in the entire world and does not come off of anything very easily. In the past I've used modeling clay for this project, much more firm, and will do so again in the following years. Lesson totally learned! At least the kids still had fun with this one.

February 1, 2011

Melting Ice


We set up a large block of ice in our water table during outdoor play time. The students were given spray bottles with tinted water, salt shakers with glitter/salt mix, eye droppers, and food coloring to explore with. We loved learning what happens to ice when you put salt on it and the food coloring let us see the process better.

Ice Treasures


Using a mold I froze toy bugs and animals into water tinted with food coloring. We took our ice treasures to the park on a nice sunny day so the sun would help us with the melting. Students also used toy 'tolls', water spray bottles, and eye droppers to help uncover their treasures.